
Growing up, I never found tinkering with gadgets interesting enough to explore. YouTube, and its plethora of everything about anything, wasn't a thing until I was finishing college, so technology felt very abstract. While I overheard talk of a robotics club in high school, I always considered things like that to be out of reach.
Pursuing chemistry in college and grad school, I never even wrote a line of code (unless you count a Geocities website I made from HTML in the late 90s). In the last five years or so since I got into software development, my passion for all things technology sparked. I conquered my irrational fear of using Linux, set up various servers, hosted a website, networked my home, and so on. I've listened to talks about Internet of Things (IoT), learned how to do basic electrical work, and made my home a Smart Home.
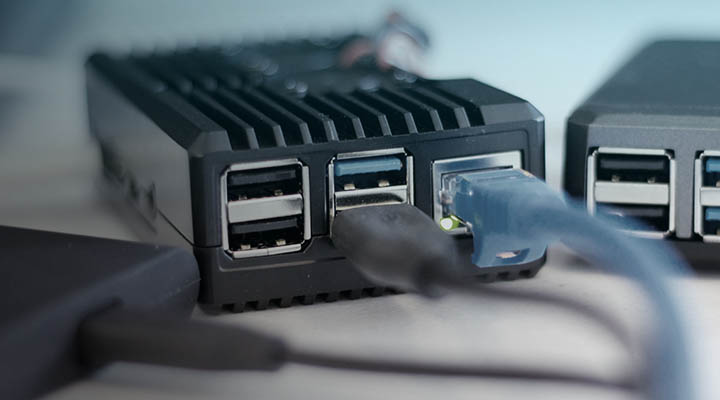
Coming in with experience as a Java Web Developer, when I joined BJSS I had no idea what was in store for me. In my first week, I was on calls trying to figure out what sort of incubator projects I could work on, and one involving AWS IoT Core was the front runner. The first couple weeks involved researching what services AWS had to offer someone building, using, and managing IoT devices. I had a RaspberryPi 3B+ lying around that was at one point set up to work a Retro Gaming System, but I had only used it once. So, with little to no prior AWS experience, I quickly installed the Raspberry Pi OS and the AWS IoT Python SDK and started learning hands-on about messaging, pub/sub, and AWS features.
As our small team started running out of ideas for what to research, and Smart Office solutions became the obvious direction, I remembered one of the things I noticed on my first day in the New York office: it was loud. An all-hands was scheduled that day, so the office was packed. I even overheard someone apologizing for the noise on their Zoom meeting. If only there was a way to help the office maintain a reasonable volume level. Hence, the idea for a Volume Excess Notification System was born.
The Aim: Create A Volume Excess Notification System Powered By AWS
According to Techopedia, a smart device is an electronic gadget able to connect, share and interact with its user and other smart devices. By that logic, one can say that a smart office is an office that does the same by using smart devices. Just as a person might speak up and ask the office employees to lower their voices when it gets too loud, I thought it would be great to let the office itself do the hushing (after all, who could ever get mad at an electronic device?). So we set out to create a Volume Excess Notification System powered by AWS: IoT Core, Kinesis, Lambda, an AWS IoT-friendly volume sensing device, and a smart-plug/bulb. The primary goal was to measure noise levels in our New York office and notify the people in the office when it was too loud. This could be accomplished by:
- Configuring a microcontroller or microprocessor with a microphone to measure noise levels
- Sending a message to AWS IoT Core when a set noise level threshold is met
- Streaming those messages to AWS Lambda
- Having AWS Lambda call an API to turn on a light bulb for a short period of time.
WHY I CHOSE AMAZON WEB SERVICES
Measurement and notification both occur in the office, but AWS handles communication between the volume-sensing device and the notification device (plug/bulb). An obvious question comes up - why not just have the sensing device contact the notification device directly? The answer is simple - data! Many of us use virtual home assistants such as Alexa or Google to control our home, but what you may not have considered is how they know to ask you things like, "Would you like me to turn off your lights every day at 8pm?” when you have turned your lights off at 8pm every day for the last month. These programs store most, if not all, of your commands. This information is valuable to Google and Amazon because they can analyze the data for any number of reasons, such as:
- Tracking the number of times a request has to be repeated
- Testing their voice recognition software in real world scenarios
- Suggesting (marketing) additional features, apps, or merchandise
- Machine Learning & Business Intelligence
- Other uses we (and those companies) have yet to discover
In our case, we could easily have skipped the data collection step, but then we lose out on being able to answer questions like, "Which days tend to be loudest in the office?" or "Do people lower their voices when they see a VENS notification?" Coupled with knowledge of who is in the office on which days, we could even ask, "Are there select people or groups of people who are correlated with high noise levels?" If we want that type of insight, we need to store the data, and AWS is a logical choice as a cost-effective and easily configurable solution.
How I Did It?
The AWS component of this IoT project was without question the easiest part, even for someone with little to no AWS experience like myself. After gaining some basic understanding of AWS I was able to:
- Set up a Raspberry Pi with the AWS Python SDK and register it with IoT Core;
- Automatically have a device send MQTT messages to IoT Core;
- Create a rule to send IoT messages from its MQTT topic to a Kinesis Data Stream and/or Kinesis Firehose;
- Process/enhance Data from a Kinesis Data Stream with Lambda; and
- Use Kinesis Firehose to store data in an S3 bucket directly from the IoT device or after passing through a Lambda.
The difficult part was actually the heart of this project, which was finding an inexpensive device with minimal configuration requirements.
Device Selection
Choosing a noise sensing device required balancing three things:
- Cost - Should we spend $500 on a highly sensitive industrial noise meter, or a basic $6 ESP32 chip and $4 microphone?
- Ease of use - Does configuring the device require taking a course on electronics, or can we plug it in, write a few lines of code and make some noise?
- Functionality - Can the device fulfil its intended purpose? Is there adequate documentation and/or existing code/libraries that specify how to measure noise on this device?
The Raspberry Pi was the first device considered and most of the initial AWS IoT Core investigation was done on it. This modest little computer has everything one could need for just about any IoT purpose, but a device capable of playing just about any retro arcade or console game was considered overkill. A plethora of available sensors and hats (plug and play sensors) exist on the market. Over a dozen microphones (including hats) are available at ThePiHut.com, ranging from $10-60. For a Raspberry Pi Model 3B, having a price point of under $50 and offering a lot of flexibility, it's not bad a bad choice. However, supply chain shortages meant these were either all sold out or back-ordered; at the time of writing, one would be lucky to find a new one for under $150 from a reputable third party.
Alternatively, one could start with a reasonable understanding of electronics, breadboards, wiring diagrams, signal processing, voltage readings and follow any number of step-by-step tutorials on how to connect a variety of sensors to a microprocessor chip. Unfortunately, learning enough about electronics to understand how to create a noise meter from scratch was not practical, especially given the time constraints of an incubator project.
The third, and perhaps least practical, approach, was to use my BJSS laptop, its built-in microphone, and a small app using the Java Sound library. I found some existing Java code that displays sound bars on the screen when noise is detected and left only the pressure RMS calculation to see if I could make it print a message when above a certain threshold. This took very little time to attempt but was useful in showing that it could be done on something like a Raspberry Pi, which can support a Java App that uses a USB microphone.
The M5Stack Core2 was suggested for its ease-of-use and minimal requirement of electronics know-how. The device is compatible with multi-platform development (UiFlow, MicroPhython, Arduino, and more). Specifically, there are libraries that seamlessly integrate with AWS IoT Core and can be set up to send messages in minutes. It also contains an on-board microphone, as well as an optional omni-directional peripheral microphone unit, which we purchased just in case. Shipped directly from China in about seven business days, the device and microphone unit cost just under $52 with tax and shipping. I also found several examples of Arduino (C++) code for noise meters using other M5Stack devices (something that would later prove to be to our detriment). Given these considerations, the M5Stack Core2 AWS IoT EduKit seemed like a no-brainer.
Sensor Selection
Selecting a sensor proved to be less challenging, given that there were only two plug-and-play options. Configuring it, however, was a different story. Initially, I tried to configure the on-board microphone to capture noise but had no luck. At one point I even considered the rare case that the microphone might be defective. Working backwards from several Arduino code repos, and after a sustained period of rhythmic head-to-wall contact, it became apparent that the existing I2S (Inter-IC Sound) protocol libraries crucial to using the onboard microphone were not yet able to support the M5Stack Core2. After the omni-directional microphone unit arrived, I was able to connect it and, after some minor troubleshooting, start reading an analog signal using readily available MicroPython libraries.
After successfully being able to get readings from the microphone unit I found that, although I could see spikes in sound when making loud noises, it was very difficult to use the device as a noise meter. Unfortunately, the only working microphone was only good enough to serve as a proof of concept, but not actually be used to accurately differentiate noise levels. I later found on a different seller's description (Sunhokey) that says:
It can be used for audio detection and allows you to control your system with sound e.g., clap-on, clap-off control. Keep in mind it can only detect audio, not differentiate between varying audio levels.
Threshold Determination
At first, there were two strategies for the Volume Excess Notification system:
- Send averaged noise messages frequently, process them with AWS Kinesis Data Analytics, and trigger the notification device with AWS Lambda.
- Measure noise and only send averaged noise messages when the measurement exceeds a set threshold.
For the first approach, we could collect and stream regular intervals of averaged noise data, filter above-threshold values with Kinesis Data Analytics, and have a Lambda function determine whether to trigger actuation of the notification device (light bulb). Messages would need to be sent at least every few seconds because notifications shouldn't be significantly delayed. What use is an excess noise level notification if it's 30 seconds delayed? Given the frequency of these messages, we would be processing messages containing background noise. We could, of course, write code on the device to publish noise readings only during business hours, but there would still need to be several messages with averaged noise readings sent minute by minute. When making this decision, we were aware of the limitations of the microphone, and because Kinesis Data Analytics has an associated cost, it was impractical to send and process messages that effectively tell us nothing about the state of the office.
Since the second approach was chosen, the next step was to determine when to send messages. Given the microphone could only be useful in detecting noise spikes, I came up with a very clunky approach to determine what could be considered above-threshold, (i.e., when a message should be sent). It was difficult to empirically determine what "loud" is, since it's very subjective. I decided to take the scientific approach and write some code where I could change one variable at a time and see if the noise meter could at least differentiate between a cough and playing loud music.
The algorithm was written to measure the number of small noise spikes occurring over a set period of time. A spike threshold was set and these two values were adjusted until a cough would not trigger the microphone from three feet away, but loud music would. For example, if more than 20 noise spikes were recorded over a one second measurement window, a message would be sent. However, the averaged noise level over that time would always be indistinguishable from averaged background noise levels. This is because those spikes are only slightly higher than background, even in a loud environment. Spikes are also infrequent relative to the number of actual measurements taken. In addition to setting a threshold for the number of spikes, a threshold had to be determined for what is considered a spike. That was determined by playing an audio track of people speaking in a café at an uncomfortable level (again, very subjective) and determining to what average reading that noise corresponds. As much as I avoid using visual coding interfaces, for IDEs without autocomplete, this was the most user-friendly approach.
Having these numbers more or less figured out, the IoT device was installed in the NYC office and left hanging for a day while multiple people were present. Despite all attempts to get predictable messages, the device would occasionally recognize laughter from the break room or someone raising their voice, but not consistently enough to call the device an Excess Noise Monitoring System.
Notification Device Selection
The easiest way to notify people of excess noise was to install a smart plug in one of the higher up sockets in direct view of most of the seats in the office. Into the smart plug we could, for example, plug in a series of light strips to span the perimeter of the office. For demonstration purposes, a light bulb and socket adapter was plugged into the smart plug. The Kasa brand smart plug was used because it is one of the few inexpensive devices that can be accessed via an API, specifically via TP-Link Cloud. There are several examples and a community dedicated to creating third-party libraries to access the Kasa smart devices via their API key rather than through the cloud.
As time ran out on the project, we did not integrate the device into the Volume Excess Notification System. It would have entailed re-using some existing Python to create a Lambda that calls the TP-Link Cloud API with credentials, retrieves a security token, and sends a request to the device via its API key to turn it on and then call it again in a short period of time to turn it off. If I can convince the right people, I would like to set up a device like this to flicker a color LED light strip in the office whenever Karma is sent, but that's a topic for another day.